The holidays tend to be a daunting time for everyone’s gut. The anticipation of the stomach aches from overeating and all the sugary splurges. Not to mention the effects of stress and sleepless nights have on your body.
Hoping to prevent these holiday effects?? You’ve come to the right place!
Starting with the food on your table. It’s much easier to make the decision to eat healthy and clean when there are only beneficial meals on your table. Things to keep in mind…
Courses: Focus on vegetables!
Prevent temptation: Reduce the gluten
Liquids: Drink lots of water throughout the day
Oils: Use extra virgin olive oil, coconut oil, ghee or avocado oil
Courses
Focus on the vegetables!
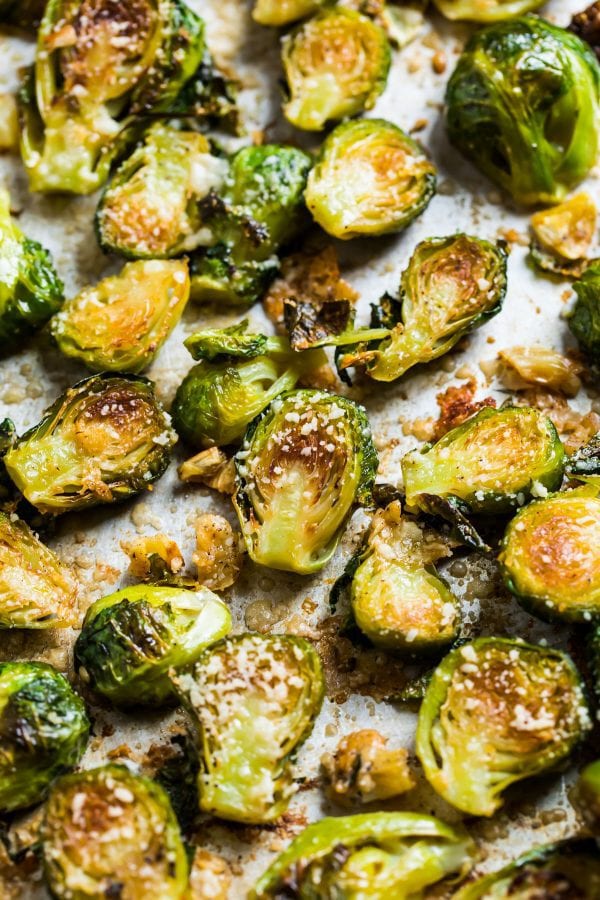
Oven Roasted Brussel Sprouts
Ingredients
- 1 1/2 pounds Brussels sprouts trimmed and halved
- 4 cloves garlic very roughly chopped (leave the pieces a bit chunky; add more if you live in a house of garlic lovers)
- 1 ½ tablespoons extra-virgin olive oil
- 1/2 teaspoon kosher salt
- 1/4 teaspoon black pepper
- 2 tablespoons freshly ground or grated parmesan
- Optional Add-ons: lemon, balsamic vinegar, herbs, red pepper flakes, etc.
- Place a rack in the upper third of your oven and preheat the oven to 400 degrees Place the Brussels sprouts and garlic in the center of a large rimmed baking sheet. Drizzle with olive oil and sprinkle with salt, pepper, and any other desired spice additions. Gently mix until the Brussels sprouts are evenly coated, then spread them into a single layer on the baking sheet. For even better crisping, flip the Brussels sprouts so that they are all cut sides down.
- Bake for 10 minutes, then remove from the oven and stir in the parmesan cheese. Continue baking 10 to 20 additional minutes, until the Brussels sprouts are lightly charred and crisp on the outside and tender in the center. The outer leaves will be very dark too. Watch carefully towards the end of the baking time, as the cooking time will vary based on the size of your sprouts. Remove from the oven. Season with additional salt and/or pepper to taste. Enjoy immediately or at room temperature.
Notes
- For Bacon Brussels Sprouts: Add the bacon pieces to the sheet pan right along with the brussels sprouts in Step 1. They will cook in about the same amount of time.
- For Balsamic or Lemon Brussels Sprouts: Drizzle the vinegar or lemon juice over the sprouts after removing them from the oven. Return the pan to the oven for 1 to 2 minutes, then serve.
- See the blog post for even more recipe variations!
- Store leftovers in the refrigerator for up to 4 days. Re-crisp in a 350 degree F oven or rewarm in the microwave.
- TO MAKE DAIRY FREE, VEGAN, or Whole30: Omit the Parmesan or swap it for nutritional yeast. Sprinkle on the nutritional yeast just before serving.
Recipe from www.wellplated.com
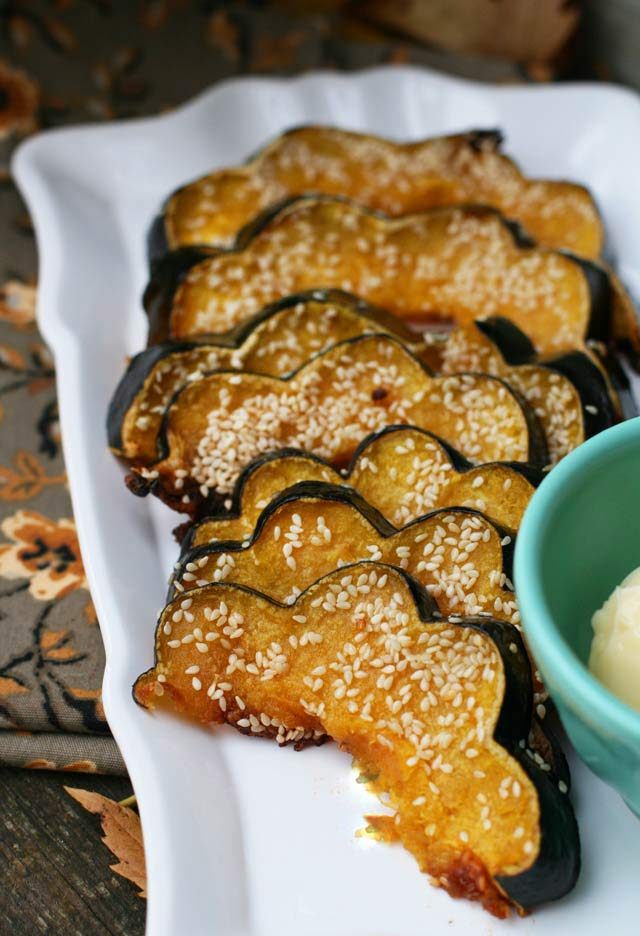
Roasted Squash with Sesame Seeds and Cumin
Ingredients
- 3 tablespoons sesame seeds
- 1 1/2 teaspoons cumin seeds
- 2 small acorn squashes (about 1 pound each), halved, seeded, and cut into 1-inch wedges
- 1 teaspoon ground coriander
- Coarse salt and freshly ground pepper
- 3 tablespoons extra-virgin olive oil
Directions
- Preheat oven to 400 degrees.
- Toast sesame seeds in a small skillet over medium-high, shaking pan frequently, until golden brown, 1 to 2 minutes. Add cumin seeds and toast until fragrant, about 30 seconds more. Transfer seeds to a small bowl; let cool.
- Toss squashes with coriander, 2 teaspoons salt, 1/4 teaspoon pepper, and oil on a rimmed baking sheet. Spread in a single layer; roast 15 minutes. Add sesame mixture and toss to coat, then flip slices. Roast until squashes are tender and golden brown, about 15 minutes more; serve.
Recipe from www.marthastewart.com
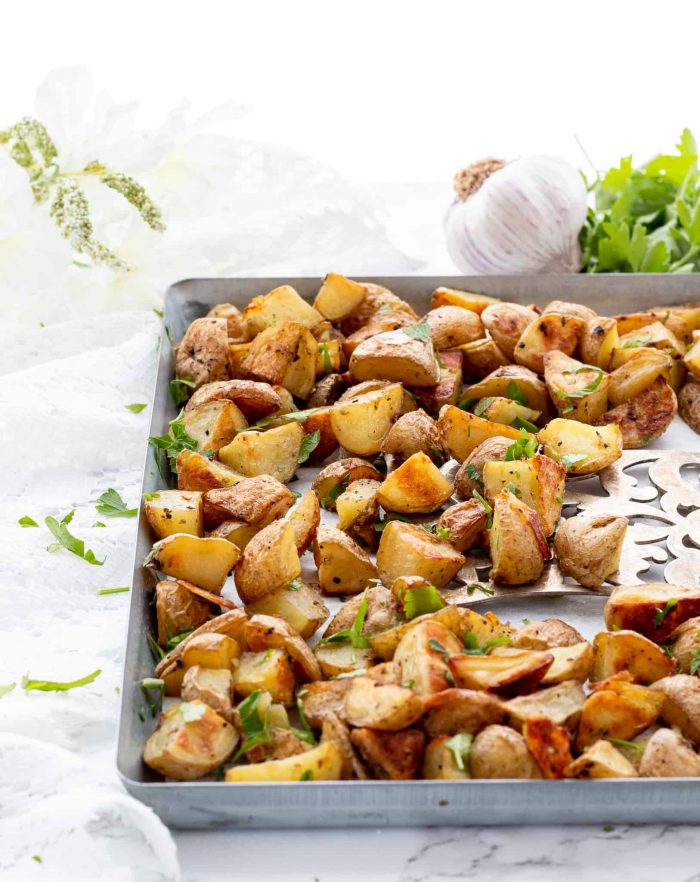
Potatoes, Garlic roasted
Ingredients
- 1.5 lbs mini red or white potatoes cut into 1/2 inch pieces
- 2 tbsp extra virgin olive oil
- 4 garlic cloves minced
- 1/2 tsp each salt and freshly ground pepper (or more to taste)
- 3 tbsp chopped parsley for garnish optional
Directions
- Preheat oven to 450 degrees F. Line a baking sheet with parchment paper.
- Place diced potatoes in large bowl with olive oil, garlic, salt, and pepper; toss until the potatoes are well-coated.
- Transfer the potatoes to a baking sheet and spread out into an even layer.
- Roast in the oven for 20 minutes. Flip and roast for an additional 20 minutes or until brown and crisp. You may need to adjust the cooking time depending on your oven.
- Remove potatoes from oven and toss with chopped parsley. Serve warm.
Notes:
- Cut the potatoes into pieces that are roughly the same size to ensure that the potatoes are finished cooking at the same time. I cut mine into 1/2 inch pieces to allow all of the edges to get brown and crispy. If you keep the pieces larger, you may need to increase the cooking time.
- Line baking sheet with parchment paper to prevent the potatoes from sticking to the pan.
- Distribute the potatoes in a single layer on the baking sheet, making sure that you don’t overcrowd them, so that all of the potatoes cook evenly.
- Cook the potatoes at a high temperature. Roasting the potatoes at a higher temperature can help contribute to that nice brown and crispy outside! You may need to adjust the time depending on your oven since all ovens are different. If your potatoes aren’t quite crispy after 40 minutes, you may need to put them in for additional time or use the broiler for a few minutes.
Gluten Substitutes
Bread
There is no need to derail your progress due to the tempting smell and sensation of warm bread this holiday. Here is an amazing product from Simple Mills that can be made into a loaf, rolls or flatbread!
Find this brand at your local grocery store in the gluten-free isle or specialty food isle. Also, found at WholeFoods, Plum Market and other variations can be found at Trader Joe’s.
Pie {Gluten Free & Dairy Free}
Make your own!! It’s easy as Pie!!
May I remind you that fruit pies are an easy alternative to dairy filled treats? There is a multitude of recipes and even pre-made pie crusts available that fit your dietary needs.
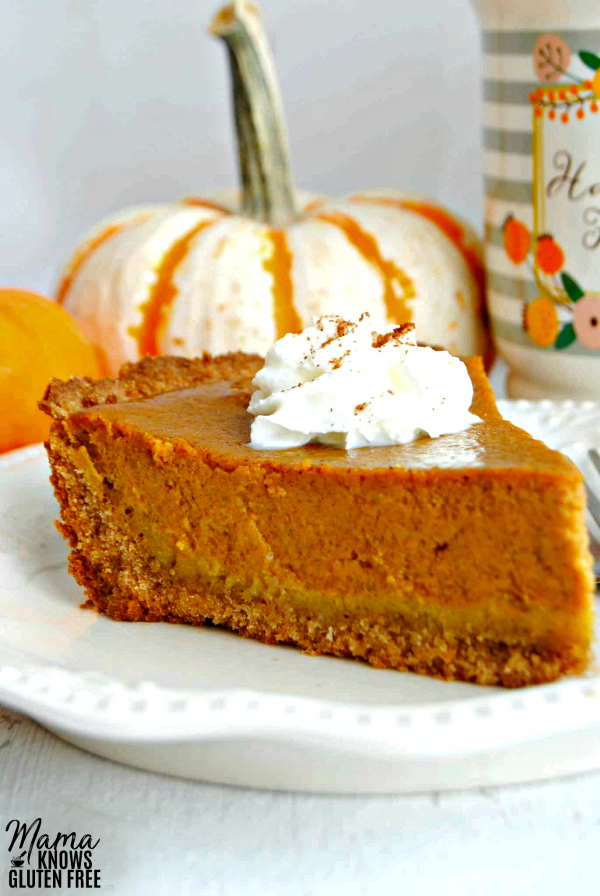
Gluten-Free Easy Pumpkin Pie
Ingredients
- Crust
- 2 cups crushed gluten-free Cinnamon Chex cereal , (or your favorite flavor of gluten-free Chex)
- 1 cup gluten-free Bisquick (If you don’t have gluten-free Bisquick, see the recipe notes to make your own.)
- 1/2 cup unsalted butter (dairy-free use Smart Balance butter)
- 3 tablespoons ice water
- Cooking spray (I like coconut spray)
- Pumpkin Filling
- 1 15 oz. can pumpkin not pumpkin pie filling
- 2 large eggs
- 1 12 oz. can evaporated milk dairy-free use 1 cup of full-fat canned coconut milk
- 3/4 cup sugar
- 1 tablespoon pumpkin pie spice
- 1 teaspoon ground cinnamon
- 1 teaspoon pure vanilla extract
Directions
- Preheat the oven to 425° F.
- Crust
- Crush the gluten-free cinnamon Chex cereal in a food processor until you have 2 cups.
- Add gluten-free Bisquick and chopped butter (dairy-free use Smart Balance butter) in the food processor. Process until the consistency of thick sand.
- Pour the Chex mixture into a bowl. Add the ice water and mix with your hands until a compact dough has formed. Refrigerate while making the pie filling.
- Pumpkin Filling
- In a large bowl beat eggs and sugar together.
- Add cinnamon, pumpkin pie spice and vanilla and mix until fully combined.
- Add pumpkin and mix until fully combined.
- Stir in evaporated milk and mix until fully combined. Dairy-free use 1 cup of canned coconut milk (full fat).
- Spay 9-inch pie dish with gluten-free cooking spray.
- Press the dough into the pie dish.
- Using the middle rack, bake for 5 minutes at 425° F.
- Remove from oven and pour pumpkin pie filling into the pie crust. Depending on how deep your pie pan is, you may have a little of the filling left over. I always pour it into a custard cup and bake it.
- Using the middle rack bake for 15 minutes at 425° F and then lower the heat to 350° F and bake for an additional 40 to 50 minutes. Please watch your pie and if the crust is getting too brown for your liking cover crust edges with foil.
- Allow to cool before serving. I like to allow the pie to cool for at least 1 hour before I refrigerate the pie. It’s best served cold.
- Serve warm or cold with whipped cream. Enjoy!
- Once cooled cover and refrigerate.
Notes:
- If you do not have the gluten-free Bisquick, you can make your own with this recipe.
- For dairy-free use 1 cup of canned coconut milk (full fat) and Smart Balance butter.
- I bake all of my pies in a 9 1/2 inch deep pie pan. A deep-dish pie pan is 1-1/2 to 2 inches deep.
- Once cooled cover and refrigerate.
- Mama says, “Always check your labels!”
Recent Comments